 Photo by Christian Cagni
Originally Posted On: https://southweststonesupply.com/installing-thin-stone-veneer/
Whether you are a proud homeowner or selling your house, curb appeal is undoubtedly important to you. One study concluded that houses with a strong curb appeal sell for up to 14% more than other listed homes.
Most homeowners know the basics of improving curb appeal. They are already doing things like power washing, painting, and doing some landscaping.
Do you want the type of house that people stop and stare at? Consider adding a thin stone veneer to the front of your home. Read on to explore topics like installation and required tools.
Custom-cut thin stone veneer at Southwest Stone Supply
How to Cover a Concrete Wall with Stone Veneer – This Old House
What Is Stone Veneer?
There are two primary types. First, natural thin stone veneer is a thin-cut, lightweight stone siding that is real rock. Faux stone veneer is a manufactured product designed to look like natural stone. Both are used for decorative purposes on the face of many different structures, as well as for luxurious interior design.
Builders and homeowners use stone veneer as a way to beautify a structure without breaking the bank. A stone veneer project costs a fraction of building with a full-bed natural stone.
Stone veneer is frequently used to cover concrete facings or chimneys. An excellent choice for wainscoting and other accents, it can be used on both the interior and exterior of your home. Also, stone veneer comes in different colors, textures, and shapes allowing users to be creative with their designs.
What Tools Are Required?
Of course, you will need the basics like a tape measure and level. Also, safety equipment is absolutely necessary including glasses and an N95 mask to prevent dust inhalation.
Specifically for stone veneer, you will need a wet saw to cut individual pieces. Another common tool required is a masonry hammer to shape stones.
You will also need a mason’s trowel to apply mortar. Depending on the specifics of your job, you may need additional tools. (See the video above from This Old House)
What Preparation Is Required for Thin Stone Veneer?
Many people wonder how to install a thin stone veneer. They are curious whether it is a do-it-yourself (DIY) project or requires professional installation. The answer to this question depends on the consumer’s skill level and the complexity of the job.
The first step in the installation process is preparing the surface. Depending on the surface type, you may need to power wash or sandblast it. The next step is affixing a weather-proof barrier and mesh metal lath with galvanized nails.
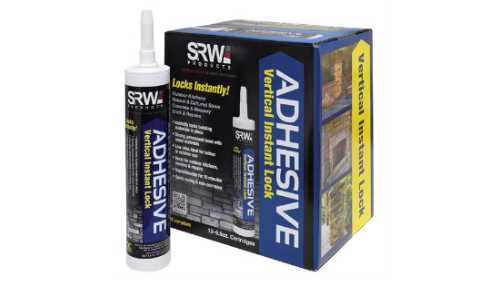
Once the surface is prepared, it is time to add your adhesive. For a stone veneer, you are going to use masonry mortar. Experts recommend applying ½-inch of mortar with a trowel. For a small job such as a fireplace surround or overlay, or perhaps an accent wall, we often recommend SRW’s Vertical Lock Adhesive. It can make the job faster and easier.
How Is the Stone Set?
With the surface fully prepped, it is time to apply the stone veneer. Start by firmly pressing the stone against the surface, using a wiggling motion to squeeze excess mortar from the edges.
Some installers tap the stone with a rubber mallet. The intent of both strategies is to ensure a strong bond between the stone and surface.
The final step is to grout the joints giving your stone veneer a finish and consistent look. Some jobs require a metal striking tool to scrape away excess mortar on the edges.
What Are You Waiting For?
Stone veneer is an inexpensive way to boost curb appeal at your home. There are many different designs that will help beautify your home structures.
If you are interested in buying a thin stone veneer, contact us today for professional assistance.
